Samples >> Shadow Removal >> 4
Shadow retouching services: Harsh shadow removal in photographs
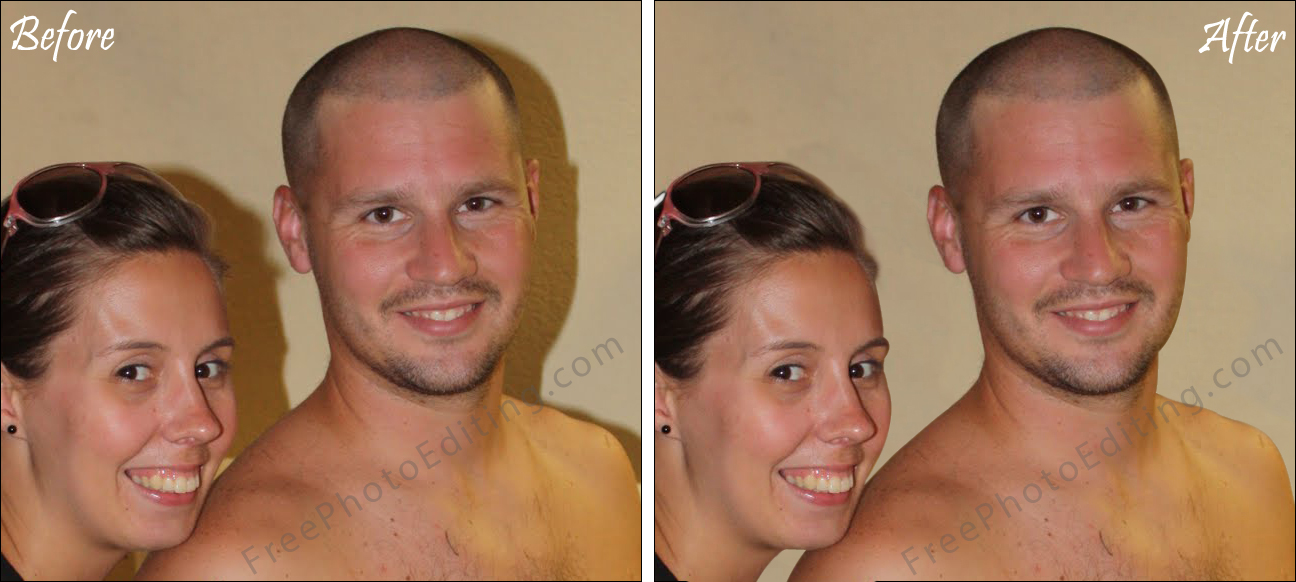
The before-and-after sample on this page showcases our harsh shadow removal services. Dark shadows caused by the camera flash can be seen around both the subjects, which have been removed with shadow photo editing.


Shadow retouching
Photo retouching of portrait with harsh shadows
By our reader Rex Addison
You can edit a portrait with strong harsh shadows from a flash or light and improve it considerably. You should first take care of the shadows in the background. To do that you should create isolation around the model. You can use the Wand tool to do that. Press the alt key and click where you want on select and just get a bit of a rough selection of what you want to isolate. If the selection doesn't look very precise, use the Refine Edges tool.
Note that it could be difficult to isolate the model if the hair color is similar to the background color. However, that can be taken care of later. For now just go all the way around the hairline and feather it by a couple of pixels so that there are no hard lines. And now to make your background look proper, use the Gradient tool. Press the G key or select Gradient and make sure you're on the solid color to solid color gradient default.
Harsh shadow removal with photo editing
With your layer selected, go to the bottom and press the alt button which gives you the high drop tool and press alt. This will allow you to put that color in the foreground and press the X button, which will put that color in the background and then press alt and click on the top. At this stage you will that in the foreground and background you have two colors from the image.
Now create a new layer and draw the gradient. Stay at the top and drag to the bottom. You will have your model more or less isolated on the background. Press Control D to deselect and now you can go in and double check all the edge and make sure it doesn't look too sharp and cut up anywhere. Make sure there are no stray hairs left. If there still is hair, create a layer mask and then paint it black with the brush tool. Take away some of this layer and paint back the hair.
Now to make the model look a little less isolated and cut out, you should bring back just a touch of those shadows that were there originally. Go to the Opacity for this gradient layer and pull it back a bit and you can see these shadows just start to appear. Now it will like the model was shot in a room or a studio, but it doesn’t have that really harsh shadow look to. Does the image still look too dark? Go to curves and press the adjusted layer and go up to curve. You have to bring up the right side as there would be some whites and bright light areas.
Color correction
If I want to color correct, it would be a lot easier if the image was a raw file. But it can also be done in Photoshop. To to color correct, create new curves there and if you click on the middle eyedropper tool, you can select somewhere in the image that’s grey. This will adjust these curves so that it all becomes middle grey.
Assume this one is white and it could be a cream-colored wall or a little bit of a pink wall, it's hard to tell. But if you select on the bottom, it gets fairly close to something that might be natural. Although it looks a little too red, keep it that way for now. And then on this layer bring down the opacity halfway. Another thing you can do in portraits like this is to bring down the saturation a little bit.
A benefit of reducing the saturation is that it allows you to up the contrast in the image a little bit without blowing out the colors. A strong flash can create hotspots on the model's face. As a quick fix for that, you should click on the original layer and create a duplicate layer. Then with the brush press the B button and get a fairly large brush but make sure it’s soft. Now use the color picker to paint and the foreground color and bring the opacity down to 10%.
Natural looking shadow editing
You can use the slider to paint just slightly in that area one or two times and then go to the other area and paint just on the bright spots. If you can't see much of a difference, compare the before-and-after and you will see a fair bit of improvement. You can also paint a little bit under the eyes and then light them up a little bit. If you hide the layer, you will see just a touch of the highlights disappear making them a little bit more subtle, but making sure it is still there. Make sure the eyes have good black smoothness. Pull down the blacks quite a bit, so that the pupils are 100% black. You should bring the opacity up to 100% so you're actually painting and putting little touches on the eye lashes too.
One of the last things you should do is crop this image. Increase the contrast if required and you're done! If you have ended up a whole ton of layers and you want to make the image quite a bit smaller, flatten the image by pressing Control Shift E. But if you want to come back at a later time and change things around please leave all these layers intact.
REQUEST A QUOTATION
Submit your photos for assessment and pricing
(no obligation)
![]()
We provide custom photo editing services.
Click here to submit assignment or ask questions.
'Quick' photo editing is free.
You will receive a quotation for 'Paid' jobs.
Complete privacy is guaranteed.
Read FAQ
